Showing posts with label diy. Show all posts

Friday, January 6, 2017

master bathroom: phase 1

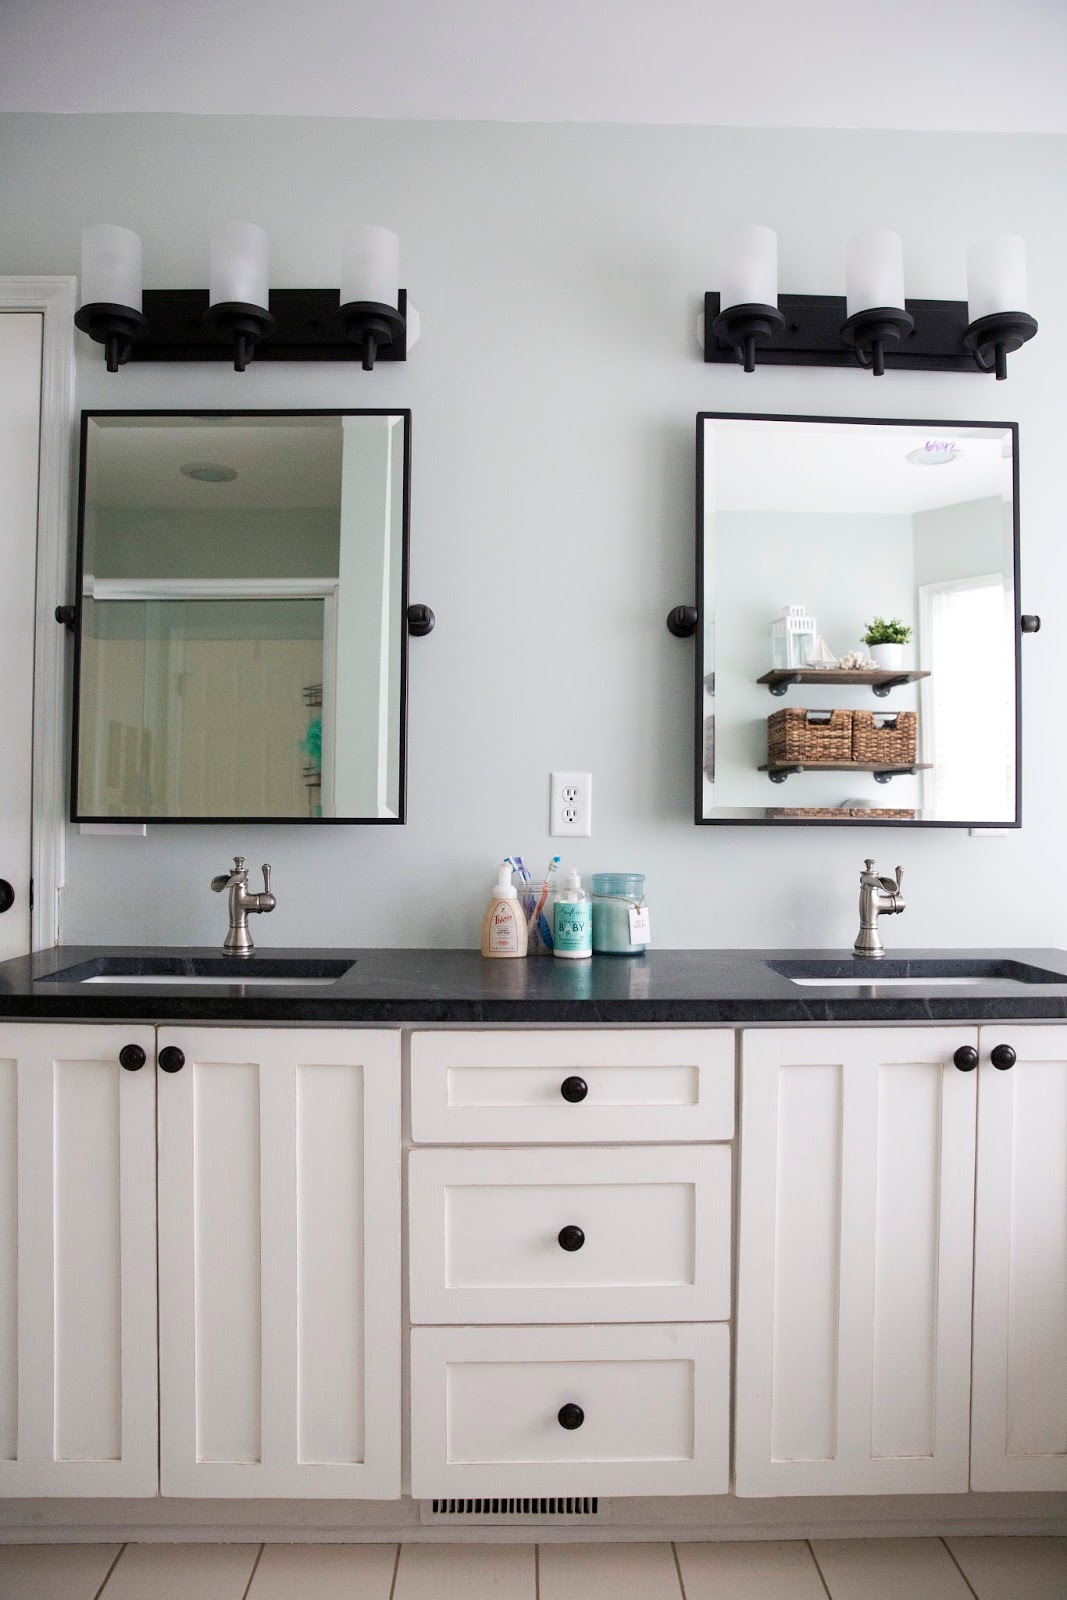
So, our master bathroom is a work in progress.   I was tired of it looking SO dated, so we did a "phase 1" update.  (mostly cosmetic, only removing countertops and mirrors as major reno parts).    If you'd like to see some of my planning and inspiration, check out my Pinterest board:  https://www.pinterest.com/nic073/home-master-bathroom/

Here's a quick Before/After to check out:  


And, let's walk through a bit of the updating.   It started out with "let's replace the mirrors"...  (I wasn't sure what size would be correct, so I tried out paper on the wall to get a visual)
 

Hmmm... what size is right? 

Which led to.... "I'm going to just paint this cabinet and change the knobs"
(Knobs are from Target, by the way)  I distressed the cabinets because I wanted them to have a worn in, farmhouse feel.   And because we have a million kids and "perfect" doesn't stick around here for long.   Painting... let me tell you.   I think I did something wrong.  I used white chalk paint and didn't prime before (I feel like I'd read you DO NOT have to prime before?"  Anyhow, I'm pretty sure I put on like 7 coats of paint.  Ok... maybe more like 4 or 5.  But a LOT.   I did use BLACK chalk paint on the cabinet in our half bath (I'll share that update later!) and it went on in 2 coats and covered like a CHAMP!   This cabinet was my "tester" because I REALLY REALLY REALLY want to paint our kitchen cabinets and after the half bath painted over so easily I thought... let's try white and then I'll give the kitchen cabinets a go.  Well.   Our kitchen cabinets are still orangey-wood so that tells ya how scared I am of that project HA!   I will, however, primer first should I attempt this again.  


Better, yes?  


Then down came the mirror and up went some Sea Salt colored paint and white trim.


Holy crap white trim makes so much difference! (I didn't paint the window trim because it was a pain and we never open the blinds on these windows)


Now for the mirrors.... AHHH I splurged on these babies.  I spent HOURS of my life trying to find them cheaper, but ended up buying them from Restoration Hardware.   If you know me, you know I'll spend far more time than necessary trying to find something at a better deal... and in the end I probably should just suck it up and pay the price.   (Though lots of times I do find good knock offs! What can I say, I'm a bargain girl at heart!)

So, you can imagine the horror when I attempted to mount this mirror myself, leaned it up against the cabinet and it fell backwards and shattered.  I cried.  I legit cried.  I called RH and cried to the unsympathetic customer service guy on the phone who basically told me "That's a bummer".   Luckily,  when I got my crap together and called again to reorder, I told the girl my sob story and she took pity on me and shipped another mirror out to me!   I LOVE HER.   


 Now its time for countertops.   Again, the master bath gets to be my guinea pig for the kitchen.   I really really really wanted soapstone in the kitchen but had heard it was super soft and not super durable.   But I loooove the worn look it has.   So, the master bath gets soapstone.  I freaking love it.   In my mind, its like granite and marble got together on a one night stand and had soapstone.   It has the veins of marble, the granite specks and unevenness, and throw in a bit of matte finish... AHHH!   In these pictures I have it oiled (mineral oil) but I rarely oil it because I like the dry, matte finish.   We've had it for almost a year and would I do it again?  In a heartbeat.   I LOVE IT.  I'm actually considering it for the kitchen.  Hmm.  


Now we need lights....  I got these from Lowe's:


And I put those babies up myself!


 It's coming along! 


Check out the Before & After in progress:::


 We still have to do something about that tile... GAH!   I'm not sure exactly what to do because I'd love to do some white subway tile, but the tub + shower + toilet is a slight off white.  Not "beige" but definitely not white.  I have thought about doing some grey/cream/white tiles around the tub and then a darker floor.   I don't know if I can justify the cost of renovating those things... but maybe we need to.  I don't know.   For now, we live with the tile.

 Here was my design board for the master bath.  

 And here is where we are now:


I try to pretend that hunter green tile coordinates with my fake plants.  Right?  HA!


Another splurge... our faucets! 


Saturday, January 10, 2015

diy Disney trading pin mini zip up book

Last year when we went to Disney World, I made the kids lanyards and ordered them some trading pins off eBay.   We all had fun trading pins with the cast members, but I didn't realize how much the boys remembered (or cared) about it until we pulled out our pins the other day in anticipation of our January trip this year.  They remembered pins they had, and traded, and had favorites and ones they wanted to collect more of.  (Who am I kidding... Ryan and I are kind of excited about finding new pins this trip too!). 

The lanyards were not a favorite of the boys.  Maybe they'll like to pick a favorite or two and wear on their lanyard, but for the most part, the lanyards rode in a pocket in the stroller.  

When preparing for our first big family trip to Disney in Dec 2013, I totally cracked up when I heard people had huge binders of pins.  And then after the lanyards weren't a favorite, I thought.... Hmmmm it would be nice to have a zip up mini book. So I decided to make one.  

I searched Pinterest and found a few ideas and kind of modified my own book.  It really was quite easy!  

I bought 4 sheets of the stiff felt at JoAnn (the sheets were legal paper sized).  They were $1.19 each I think?  2 sheets per kiddo. 


I also bought two Case Logic zip up cd cases that hold 32 cd's from Best Buy.  They were $9.99 each. I carefully took scissors and snipped the threads that attached the cd holder to the outside casing. 


I traced the cd case insert onto the stiff felt and cut it out.  I ended up using 4 of these templates per book.  


I sewed together the 4 sheets of felt.  I put two lines of stitching down the middle. 

I used a super duty craft glue (E-6000) to glue the sewed felt to the cd case.  I clamped them down with clampers (pic not shown, and also clampers is not the actual name of them I'm sure). I let the clamps and glue sit overnight.  

And here we go..... Ready for pins!  The first two pages I wrote "TRADE" on the top so the boys could keep the pins on those pages that they are willing to trade.  The rest of the pages I helped them organize by theme/character/set etc.  


Sunday, September 1, 2013

Super duper ruler....

just in time for Back-to-School!

It's been awhile since I've shared any of my crafty goodness here.  Actually, it's been awhile since I've felt like I've actually "been" here.... not just posting data and milestones and random things I want to remember.   I mean, BEING here... writing down my voice, my story, my feelings.  GAH.  This summer has gone by too fast, and well, to be honest, life seems to be flying by.  Scary, kind of.

Anyhow, in the past week or so I've had this itch to get some projects done around the house.  Not projects that have been on the To Do list for awhile.  No.  Projects that literally JUST popped into my head.  Like... HEY I should do that!!

I want to add more color to the house.  I'm so bored of bland, blah colors. I want some punches of brightness, some mis-matched vintagey items.  I need to spice it up a bit!

I do have color throughout the house but... not a lot.  Its just a few items here and there.   Here are some inspirational pictures I have pinned.

My short list is this:

-Sand/stain the kitchen table top (check... and .... FAIL.  See story to follow)
-Paint kitchen chairs (aqua?  teal?  grey-ish aqua sea-foam?)
-Paint hutch in dining room (cream, distressed heavily, and add colorful vintage paper to the back of it, and some bright, fun, vintage knobs)
-Paint coffee table and console table in living room (matching kitchen chairs, possibly)
-Make new pillow covers for pillows in living room (vintage fabrics, mis-matchy florals and patterns)
-Paint front door (hmm.... again, aqua?  Is this too much aqua????)

Ok so how did I get on this topic?  The title of my post here is Super Duper Ruler.  Uhm. Yeah.  So, I also am addicted to pinning really neat DIY and Knock-Off ideas for Pottery Barn.  So I decided on a whim to make this awesome ruler for measuring the kids....


It's a little darker than I had in mind, but I guess that's what you get when you use Espresso stain instead of the recommended Walnut.  Advice noted.  However, I did not seal it, so maybe it'll fade in time??

The kids each have their own growth charts in their rooms (made of canvas, painted my yours truly), so I just held those up to this chart to transfer their measurements.  I am thinking I'll keep their measurements on both and let them keep their canvas ones for keepsakes, and this one will grow with the family.  I'm envisioning grandkids on it someday??   EEK that's freaky to think.

So there ya go... a little fun, decorating, diy-ness for the blog.  Finally.


Sunday, May 5, 2013

First Birthday High Chair Makeover

A few weeks ago I found a picture of an adorable old high chair (painted) with a banner hanging from it.  Perfect prop for a one year birthday.  So I began the hunt for an old high chair for Amelia's birthday.   

Within a week I'd found one... in Blissfield.  It was old.  It was in rough (cosmetic) shape.   We drove an hour to get it and then I put the boys to work washing it down.  


 I sanded it, and then painted it.  And then sanded it again.   And finally it was ready.   I still have yet to take her outside to do an "official" birthday shoot with it (with a prettier background than the siding of our house) but you get the idea....