Showing posts with label crafts. Show all posts

Saturday, January 10, 2015

diy Disney trading pin mini zip up book

Last year when we went to Disney World, I made the kids lanyards and ordered them some trading pins off eBay.   We all had fun trading pins with the cast members, but I didn't realize how much the boys remembered (or cared) about it until we pulled out our pins the other day in anticipation of our January trip this year.  They remembered pins they had, and traded, and had favorites and ones they wanted to collect more of.  (Who am I kidding... Ryan and I are kind of excited about finding new pins this trip too!). 

The lanyards were not a favorite of the boys.  Maybe they'll like to pick a favorite or two and wear on their lanyard, but for the most part, the lanyards rode in a pocket in the stroller.  

When preparing for our first big family trip to Disney in Dec 2013, I totally cracked up when I heard people had huge binders of pins.  And then after the lanyards weren't a favorite, I thought.... Hmmmm it would be nice to have a zip up mini book. So I decided to make one.  

I searched Pinterest and found a few ideas and kind of modified my own book.  It really was quite easy!  

I bought 4 sheets of the stiff felt at JoAnn (the sheets were legal paper sized).  They were $1.19 each I think?  2 sheets per kiddo. 


I also bought two Case Logic zip up cd cases that hold 32 cd's from Best Buy.  They were $9.99 each. I carefully took scissors and snipped the threads that attached the cd holder to the outside casing. 


I traced the cd case insert onto the stiff felt and cut it out.  I ended up using 4 of these templates per book.  


I sewed together the 4 sheets of felt.  I put two lines of stitching down the middle. 

I used a super duty craft glue (E-6000) to glue the sewed felt to the cd case.  I clamped them down with clampers (pic not shown, and also clampers is not the actual name of them I'm sure). I let the clamps and glue sit overnight.  

And here we go..... Ready for pins!  The first two pages I wrote "TRADE" on the top so the boys could keep the pins on those pages that they are willing to trade.  The rest of the pages I helped them organize by theme/character/set etc.  


Monday, February 24, 2014

February's Kiwi Crate | Storytelling

If you want to check out January's Kiwi Crate, that blog post is HERE.   If you want to try Kiwi Crate, I have a $10 off code for you!  Use this link: http://www.kiwicrate.com/Refer?i=NicoleB56 and you'll get $10 off your first month order!

February's Kiwi Crate is all about STORYTELLING!  Fun stuff!  

When you open up the crate you see your two "main" projects (I say "main" because there are always so many other activities inside too!)

On the back of that paper is this little cut out puppet Q&A as well as 2 stickers.... see in the background the paper on the table with all the circles?   Each month they get a new sticker for that crate.  They put the stickers on one of the circles on their "My Adventures with Kiwi Crate"... kinda cute!! 

First up is the "explore!" book about storytelling.  This book is kind of like a fun activity magazine.  You can see the pages in the background... a do it yourself spoon puppet activity, a where's steve search and find....


further into the book is some parent resources, and another craft to make a monster bookmark. 

and still going.... a learning section of the book that tells different parts of storytelling, a little comic, and a make your own story.  

WHEW!  We haven't even got to the actual crafts yet!   Here they are.... My Story Theater and My String Puppet....

On the very back of those tri-fold instruction books is "things to think about"... a little info!
Moving right along.... inside the instruction book... you can see how detailed it is! And FULL COLOR!


The materials provided for the string puppet....

And the 2nd activity.... the story theater.  


Lots of great materials included!  You can see the real-life picture of the final project...


The Kiwi Crates have definitely come in handy... we are STILL using things from the January Crate! While we made dinner I had the boys sit at the table and work on some of their "explore!" book.   They decided to draw the arctic scenes.  They spent over an hour doing this!!


Then we finished up our window clings from last months crate.  That was pretty fun.  I'm excited to see how they turn out tomorrow...

Sunday, January 19, 2014

kiwi crate

Have you heard of Kiwi Crate? It's kind of like Birch Box... but for kids crafts! It's a monthly craft mailed to your door geared toward your childs' age. Last month I  randomly came across a blogger who posted about Kiwi Crate.  I was intrigued, and her post convinced me to try it.  I ordered a kit for the boys (I chose the "add a sibling" option so there are enough materials for both the boys to create!) and anxiously awaited our Kiwi Crate to arrive in January!
Upon unpacking our Kiwi Crate, I knew it was well worth it... this sucker is full of awesomeness!  If you want to try Kiwi Crate, I have a $10 off code for you!  Use this link: http://www.kiwicrate.com/Refer?i=NicoleB56 and you'll get $10 off your first month order!


I decided to take pics while unpacking it, and show you what all was in our first kit (each month is a different kit!)

Are you ready???

The theme of January's Kiwi Crate was "Polar Expedition".  It came with TWO crafts (that surprised me!  I was only expecting one).  Now... I'm not positive if this is typical, or if this is because I enrolled two kids (paying an additional $10/mo).  However, both crafts came with enough supplies for BOTH kids. 

When I first unpacked it, it came with a little "explore" magazine for each of the boys, and two pair of scissors as well.


Inside the "explore" booklet are different stories, information pages, and MORE CRAFTS!  I didn't expect this.  It came with a cookie cutter and recipes for salt dough ornaments as well as sugar cookies.  BONUS!!


What's this... MORE awesomeness in the "explore" magazine?   An experiment making a borax crystal snowflake!


Ok... so onto the ACTUAL Kiwi Crate, you know, the crafts that I expected in here. (Seriously... by this point I was like, already sold.  I hadn't even got to the kits that I paid for HAHA!)

Here are the two brochures for each craft.  They're tri-fold brochures, they have step by step instructions as well as a picture of the final project.  It also tells, on the front bottom, a time allowance, how much parental help will be needed as well as skills it encourages.

Unpacking our first project... the Polar Window Clings!  It came with 2 sets of 3D paints, two glues, two already made window clings and also patterns for them to outline to make different window clings.

The next project is the Snowball Toss game.  It came with two kits to make felt mitts, two headbands and felt ears to make the polar bear ears, and two ping pong balls with velcro tabs to stick around it.

 The boys were so excited to check everything out.  They were oohing and aahing and can't wait for us to have a little free time Monday afternoon during Amelia's nap to make their projects!


Sunday, May 5, 2013

First Birthday High Chair Makeover

A few weeks ago I found a picture of an adorable old high chair (painted) with a banner hanging from it.  Perfect prop for a one year birthday.  So I began the hunt for an old high chair for Amelia's birthday.   

Within a week I'd found one... in Blissfield.  It was old.  It was in rough (cosmetic) shape.   We drove an hour to get it and then I put the boys to work washing it down.  


 I sanded it, and then painted it.  And then sanded it again.   And finally it was ready.   I still have yet to take her outside to do an "official" birthday shoot with it (with a prettier background than the siding of our house) but you get the idea....


Friday, April 13, 2012

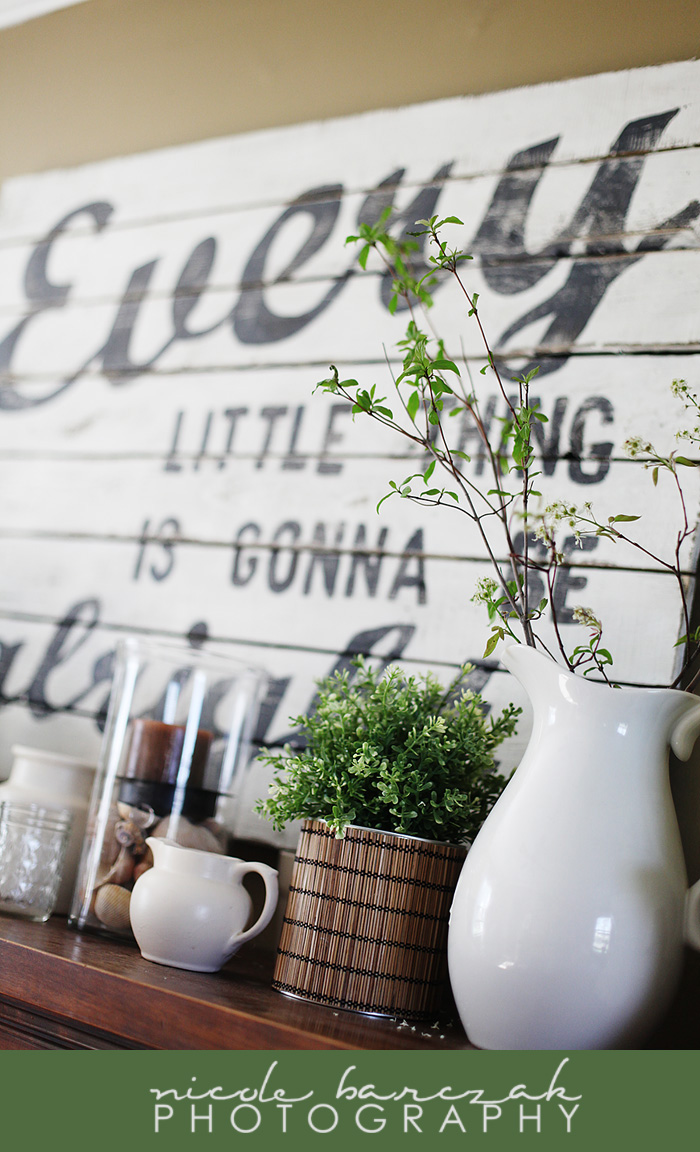
Wall Art: Every Little Thing Is Gonna Be Alright

I was itching to redecorate the mantle.  I'd had the same mirror up there since we moved in, and though I'd changed the little nick-nacky decor on the mantle I felt like it was time for a good change.  Of course, Pinterest was the sources of my inspiration.  I have a board for mantles and decided to pull together some of my favorite elements and create something springy. 

I knew I couldn't/didn't want to spend money so I used items I had around the house.  The board art.... made from a fence panel!  Scroll down for directions (though I did not take pictures.  I suck at photographing how-to's) .  

I still need to have the board hung... right now it is just propped up on two little pots.  I plan to raise it about 6" or so, so that the candles/plants etc aren't in the way.  


I had lots of ideas for the mantle wording (check out my Pinterest board for it), but I kept envisioning this typography.  It is super similar to the artwork in baby sis's room and originally I thought I wouldn't like both being so similar.  However, I couldn't get it out of my mind.  So, similar it is.

I started off with a fence panel.  We had a leftover piece from putting up our privacy fence so I just used that section.  (The panel was a 4x8 panel).  I cut off the notched top and shortened the ends so the entire artwork board was 30x42 (or somewhere similar in that range).

Then I sanded it down along the top and edges to smooth out the roughness a little.  I didn't put too much effort into it because I wanted it to look rustic and distressed and knew the roughness would help.

After sanding, I put a coat of dark walnut stain on.  This way, when I distress the paint at the end, the stain will show through.

Once the stain dried I put a coat or two of white paint on and let it dry.

Now for the difficult part.... the font.  If you're familiar with Photoshop, this is pretty simple.  If not, well..... play around :)

1. Create a new canvas in Photoshop the size of your board/fence.  Mine was 30x42.  (72ppi)
2. Type the wording onto your 'canvas" in PS.  I used two different fonts, and angled the word "every".  You can do this in any way you like... move the words around, change the sizes, stretch it out etc.
3. Then, using the "rulers" on the edge of the canvas in PS I pulled out gridlines every 8 inches across and every 10 inches down.  This created 15 different 8x10 grid spaces.  (there was a 2" space on the far right that I didn't worry about)
4.  Then I used the Rectangular Marquee Tool to "frame" around the first 8x10 grid and cropped it. Saved it as "1".  Then I hit "edit" "Step Backward" so that my entire canvas showed again.  I took the Rectangular Marquee Tool and framed/cropped teh 2nd 8x10 square, saving it as "2".  Repeat this process until all 15 have been saved.
5.  Then I printed all of the 8x10's out and taped them together.


That's probably the trickiest part to explain.  I hope you were able to follow (or figure out  a way that works for you).

Then.... using the side of a pencil I scribbled all across the back of the printout.  This way, when I trace across the front it imprints the graphite onto the board.  

Flip the entire paper over, lay onto the board and pressing firmly, trace around each letter.  
Once you pull up your paper, you should have a carbon copy/tracing of the print.  Because the boards were so rough there were spots I had to free-hand on my own. 

For the paint color, I mixed a charcoal grey and a chocolate brown.  I didn't mix them completely, but rather used both colors on the brush and let it blend as I painted in the lettering.  

After the words were dry, I took it out to the garage and used my rotary sander and sanded over the entire top and edges of the board to give it a nice distressed look.  


Tuesday, April 3, 2012

Spring Break "Staycation"

Okay so it hasn't really been a "Staycation" as much as "days we don't go to work or school so we kind of just loaf around and do random things".  Ick.   I had hoped to plan some actual activities for the boys this week (aka... going fun places like a museum etc) but at 36 weeks pregnant I'm just slightly exhausted.

Monday we ran to the post office (I sold a book on Amazon and ooops forgot to mail it!!) and then picked up McD's and ate at the park.  The boys had fun and I guess that's all that matters.  I attempted to get them to nap but Hudson was the only one who succumbed to sleep.  Meaning- I didn't nap therefore I was really grumpy that evening.


Today we attempted to have a big playdate with some friends but woke up to rain and storm.  Then one friend wasn't feeling well and had to be around home for a serviceman, and I didn't hear from the other, so I told Jess to come on over and I made myself decent and headed to Meijer to pick up some snacks, milk etc... On the way there I ran into Sadie at the end of our road- turns out she was still coming over, rain and all!  So she and her 3 boys joined us at Meijer and then we spent the afternoon at my house.  It wasn't too bad for 8 kids in the house!  It did get sunny early in the afternoon so the big boys got to go outside and play.


Jess and her kids hung out until nearly 4pm and once Ryan got home at 4:15 I laid down for a 2.5 hour nap!  EEEK!  I was exhausted and my feet were swollen and hurt.  The boys were exhausted too, and bedtime tonight was a MESS!  I had hoped to go visit a friend and her son in Lansing tomorrow but not sure if I want to skip rest time again!

I've been trying to get some little projects done around the house.  This past weekend Ryan got the Christmas lights down off the house,  Meanwhile I've been working on little decorating (aka Pinterest) projects around the house.  I made some baby bibs, embellished some burp clothes, made a cute spring wreath and a wooden pallet-type art for the mantle.  I'm still not done with the art- not sure what to paint/write on it.  I'd like some kind of quote, inspirational or family/home related... but just not sure.


I finally got my "new old van".  It is nice to have an easy-to-get-into vehicle again (I have been driving the truck).  Ry keeps saying I'm never satisfied with my vehicle but that's only because he keeps asking "Do you love your van" to which I reply... "No.  I like it, and I'm glad I have a vehicle that is running and is in great shape and fits the kids, but it's a van and, well, I don't really LOVE vans."  LOL!  I'm not trying to sound ungrateful, just truthful.  I DON'T love it, but it works for us and the price is excellent and it gets me where I need to go.  What more do I need?  Love is not required for a vehicle.  HAHA!

Today the kids were all playing with the rats and I noticed Cricket had a lump on her chest.  I did a little googling and it sounds like she has a mammary tumor. :(  I knew that tumors (likely it is benign) are common in female rats if they are not spayed (our females are not... its like $80+/rat to spay them and their life expectancy is only 3ish years) but I didn't think it'd happen this soon.  They just turned 1 year old.  So... I'm going to call around to vets and see what we should do about it.  I'm torn between thinking maybe we should have just spayed them, because if we do any type of surgery it will likely cost the same amount or more (and I'm not paying that much for surgery!).  I did read online some vets are cheap for rodent tumor removals (as low as $35) but I'm sure that won't be the case.  If that is what it comes down to I think we'll just have to have her put to sleep once the tumor gets too large for her to get around.  Poor Crickey!